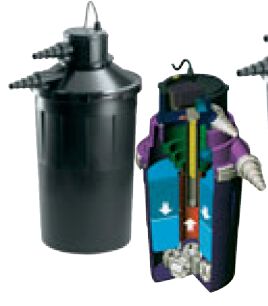
I have been using a Sera pressure filter
with UV (11W).
Sera Pond Pressure Filter T25 + UV
This filter is rated at max 6000L/hr, but in reality I bought it to handle 2000L/hr. But what I have found out is that it easily gets clogged and cleaning it is a burden. One has to open the filter, start removing sponges and water, hose down the sponges, keep bailing out water from the bottom, get to the bio-balls, remove them to a bucket of pond water, finish cleaning out the filter and then return everything to where it was.
Using the "back-wash" method doesn't clean the filter well either.
So I decided to build my own filter. I have removed all but one sponge from the pressure filter, leaving the bio-balls at the bottom and the single sponge on top of them. This will serve mainly as my UV filter. I then daisy-chain the new gravitational filter to the pressure filter. It is my intention that this new filter will be my main mechanical filter.
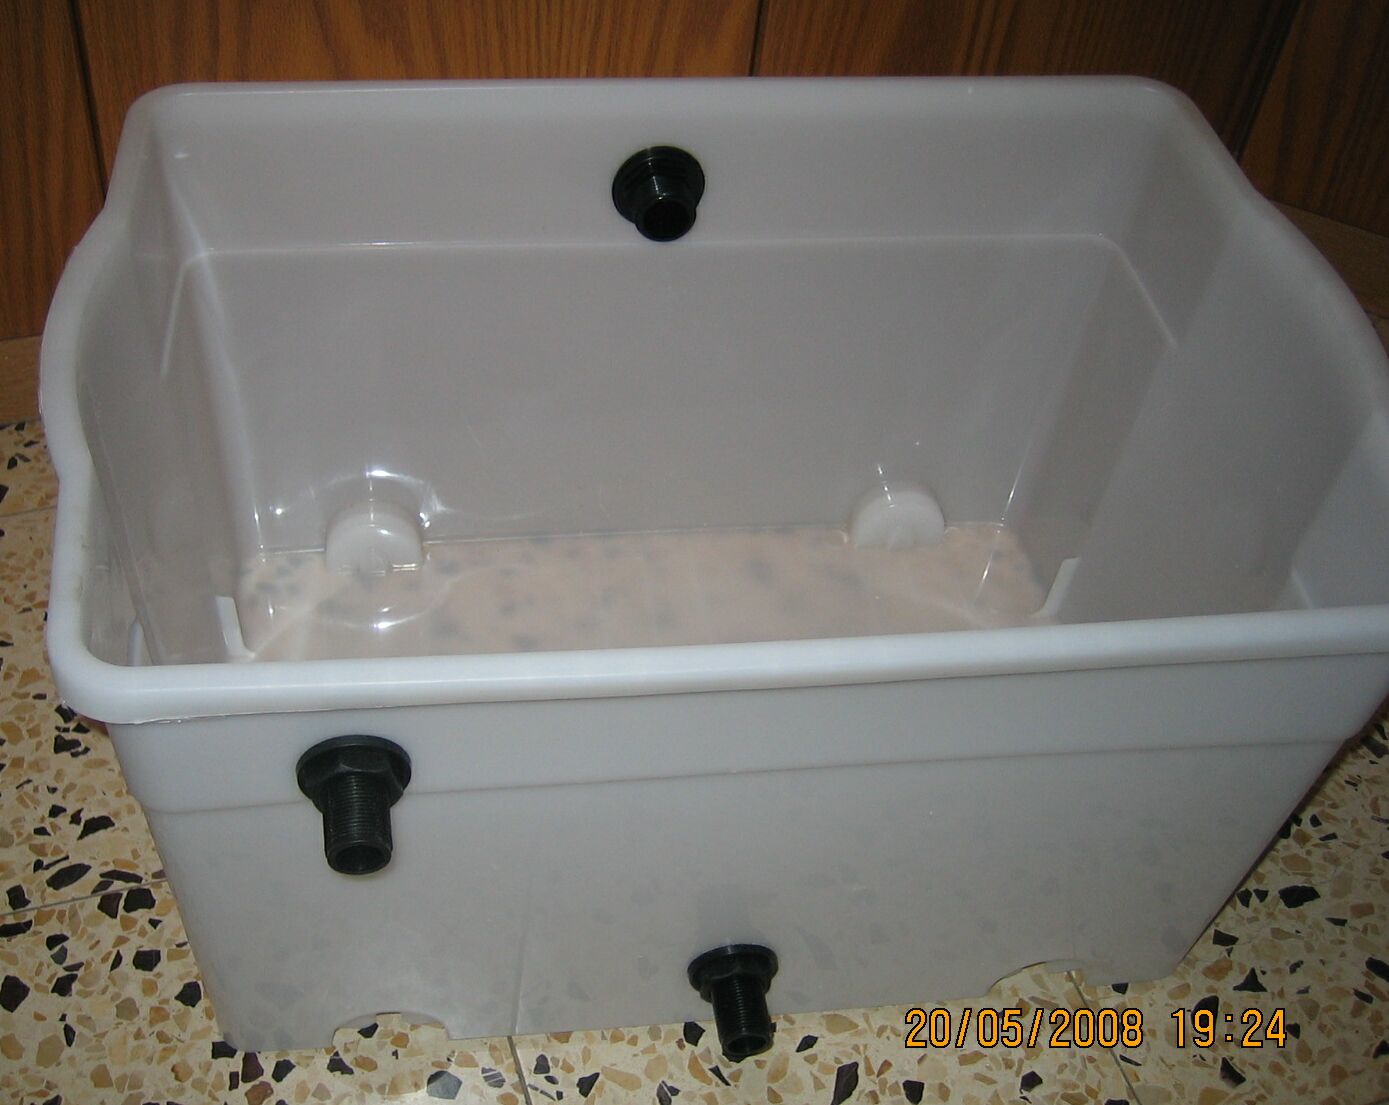
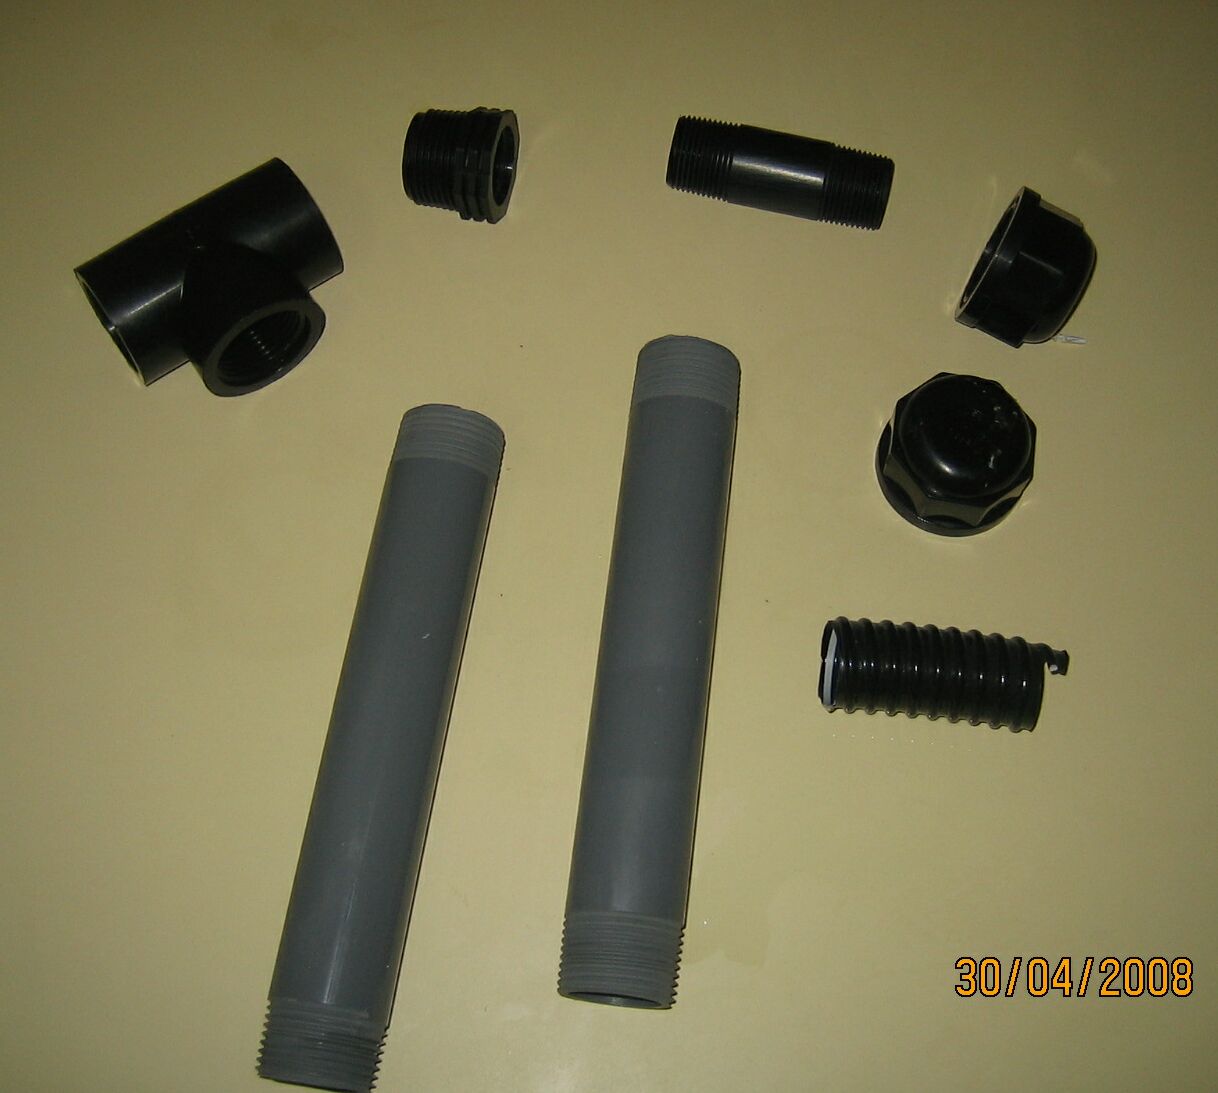
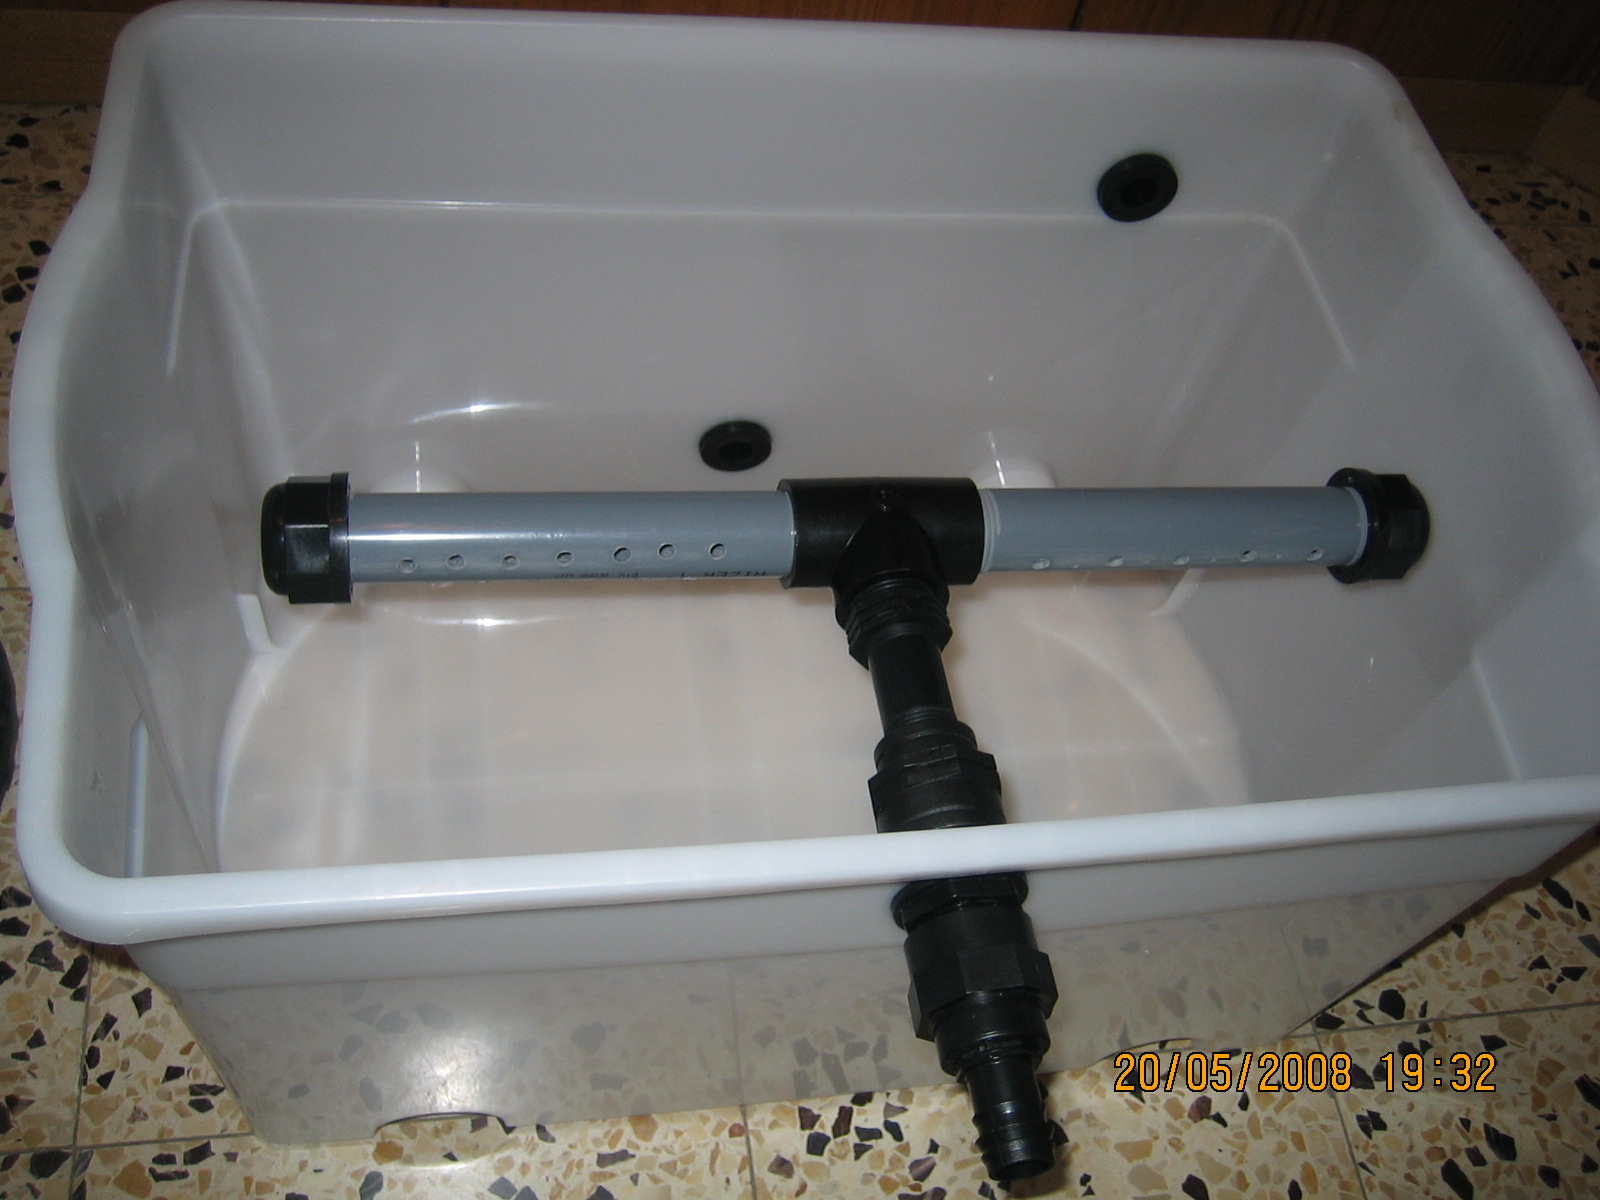
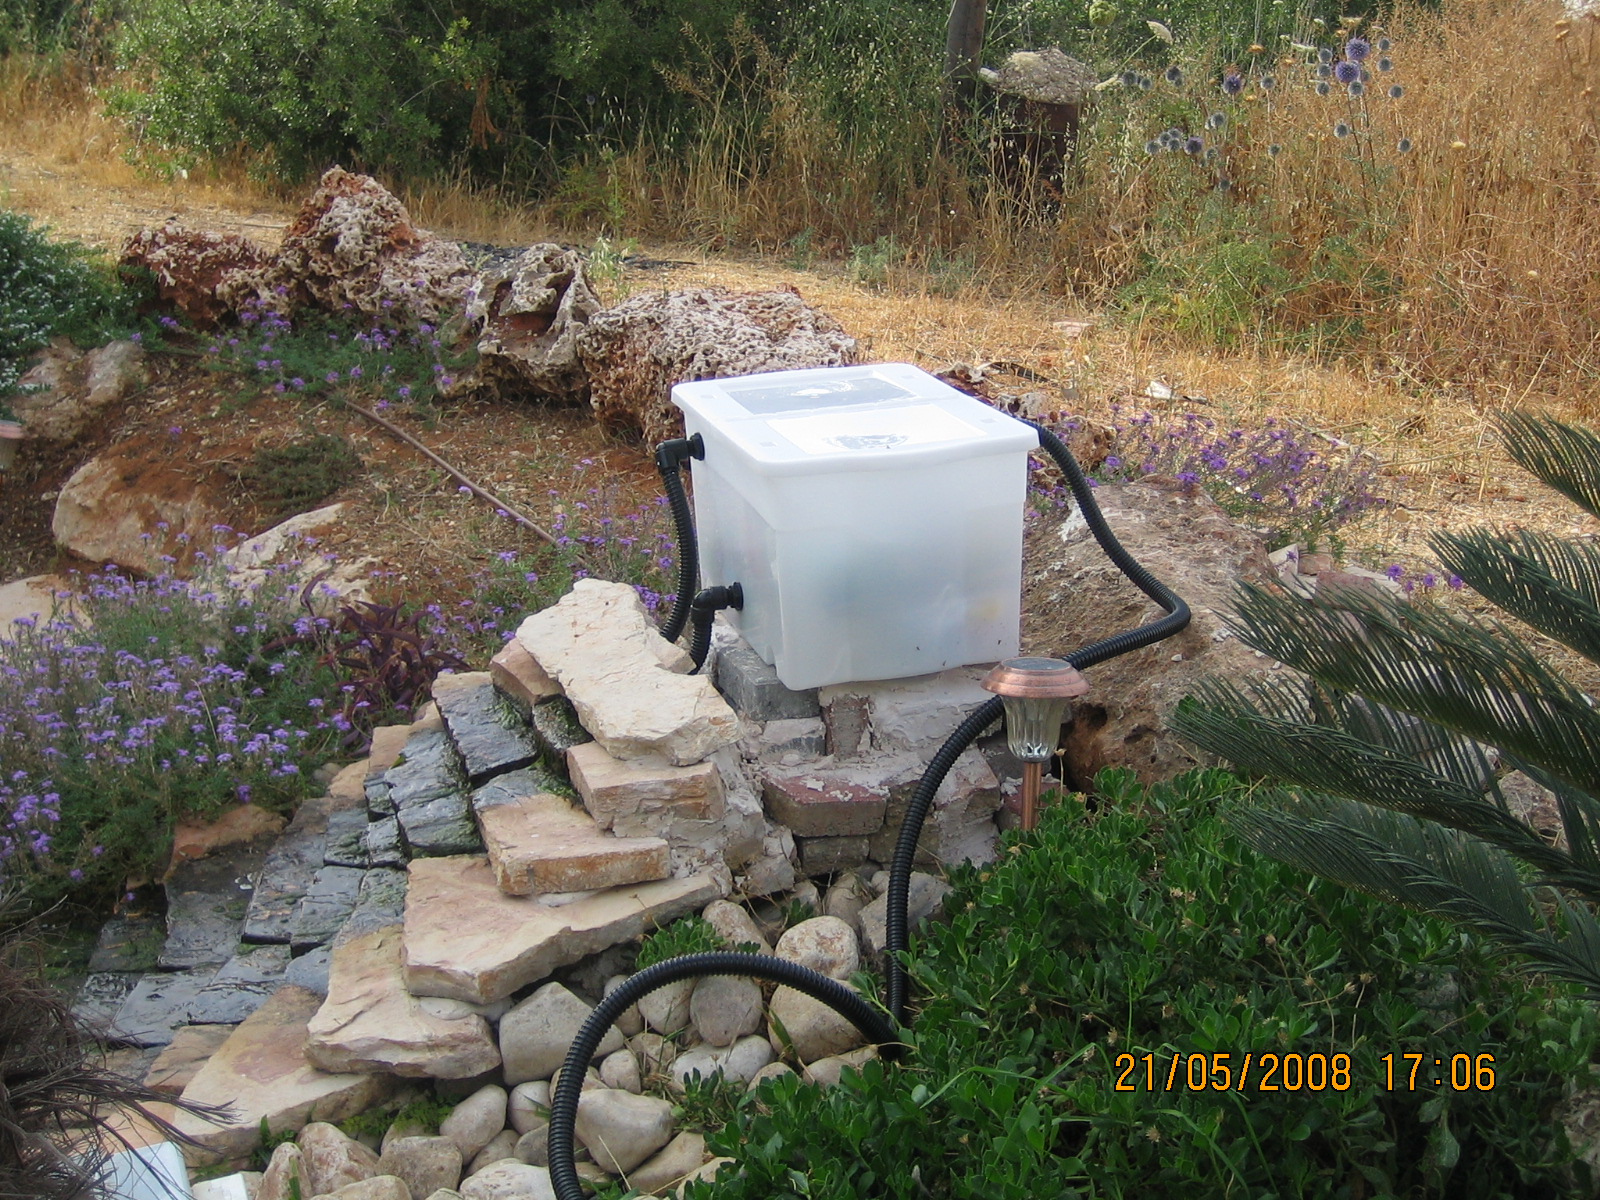
I bought a large 65L (17G) plastic storage
container ($14). I also bought a bunch of gardening connectors to build a water
distribution system inside the container as well as special barrel connectors.
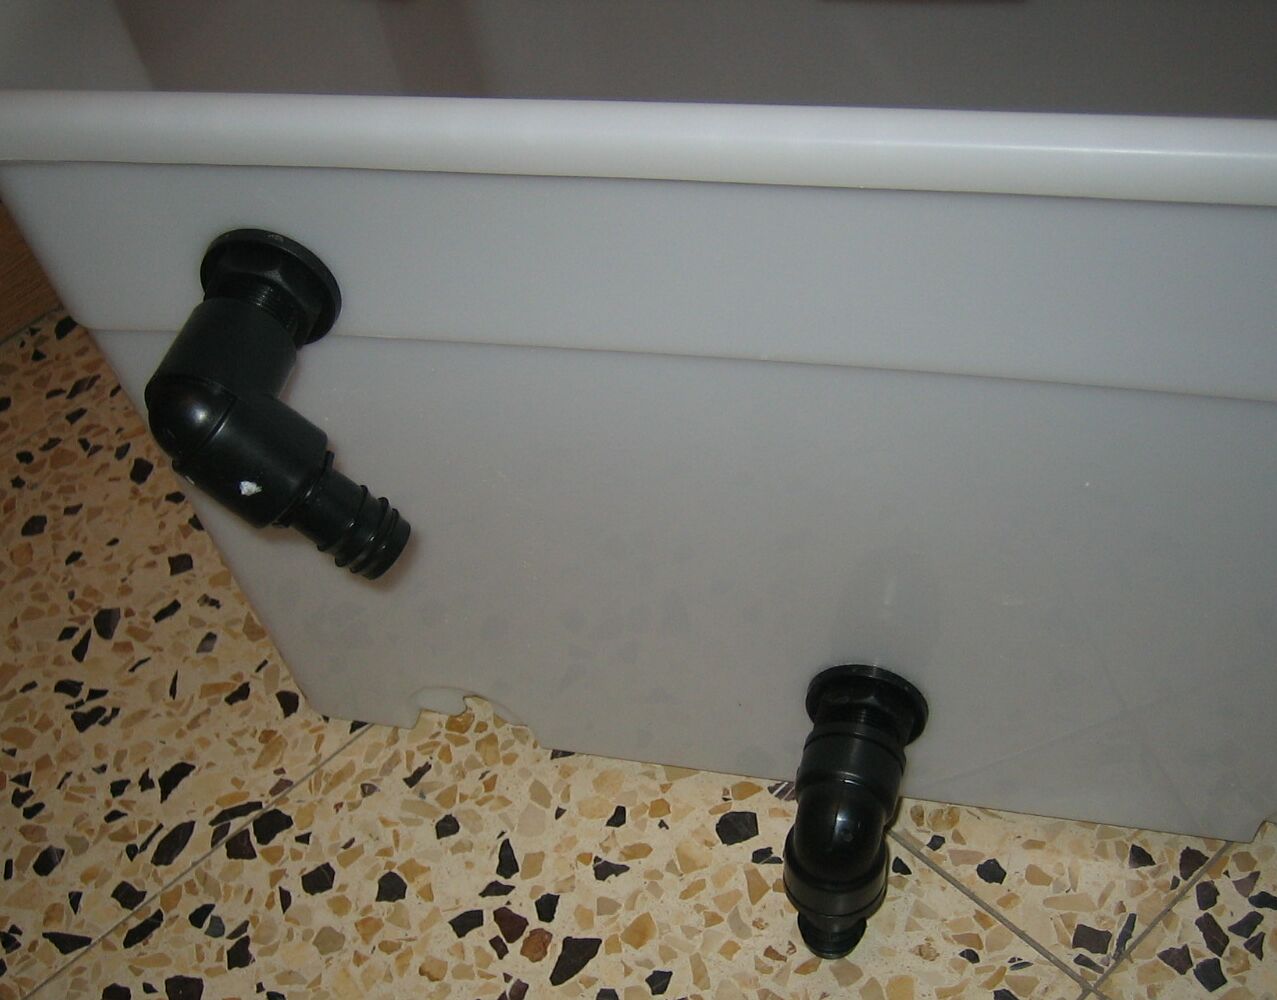
I drilled three holes in the side of the container - 2 for outlet and one for
inlet. The one for inlet is the highest in the back (1") and the main outlet
one is the lowest one (3/4"). In addition, I created an emergency overflow
outlet (3/4"), just in case the bottom outlet gets clogged (it is about 1" below
the height of the inlet).
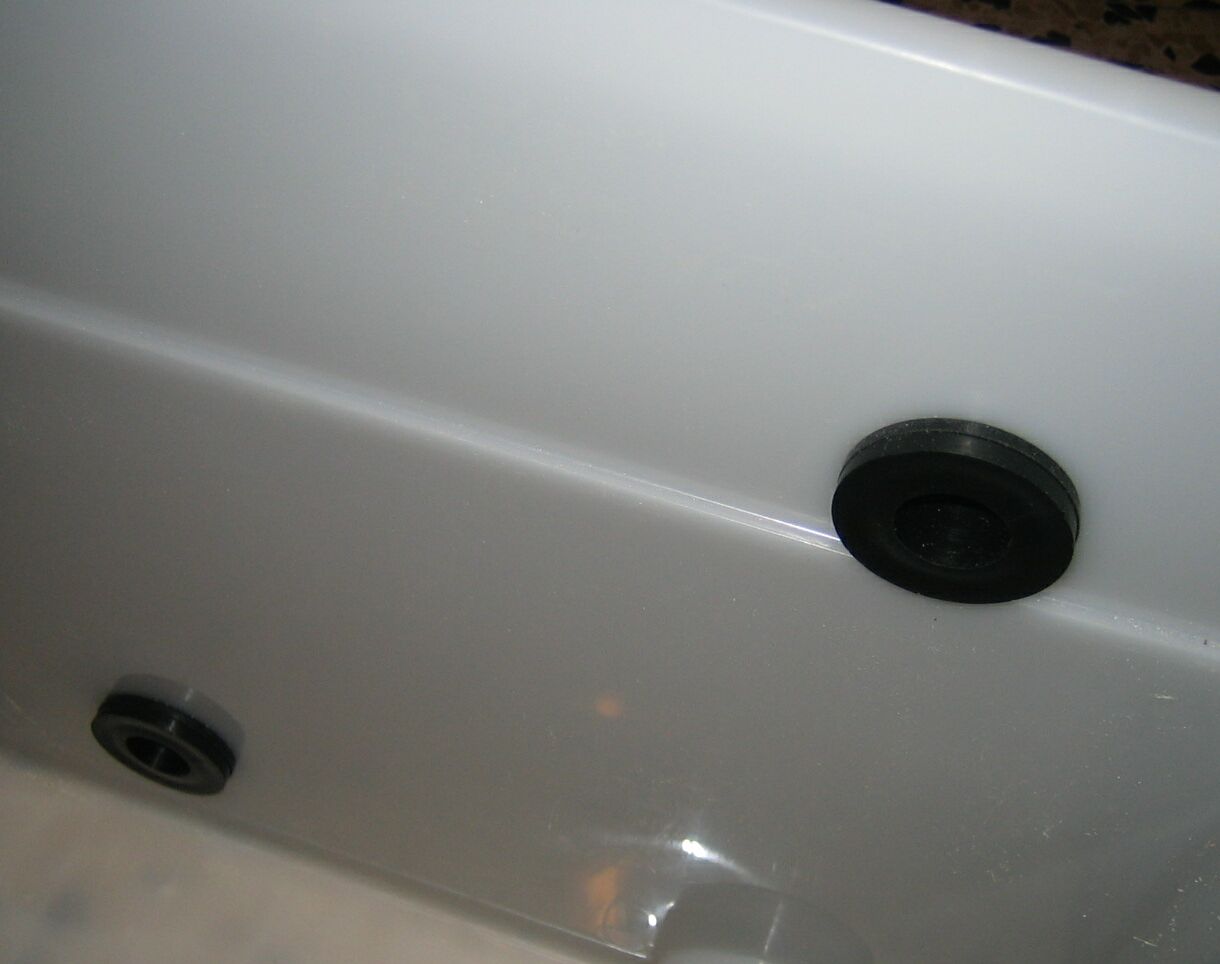
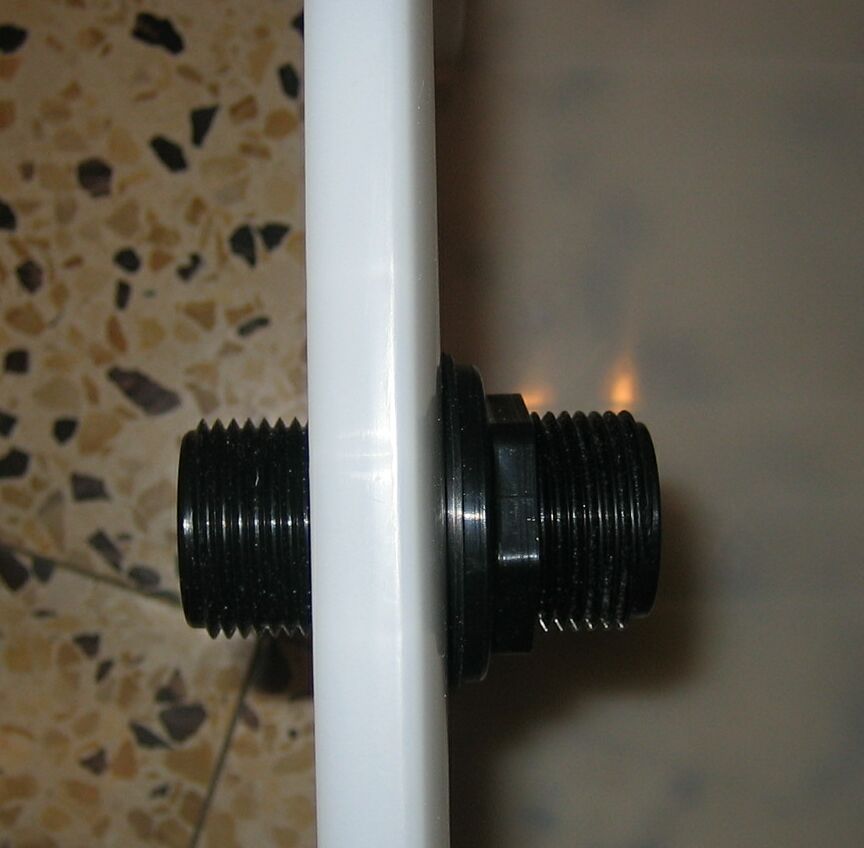
When drilling into the side of the plastic container, one has to place a piece of wood
on the other side to provide a "contra" force so that the drill hole will be clean. This
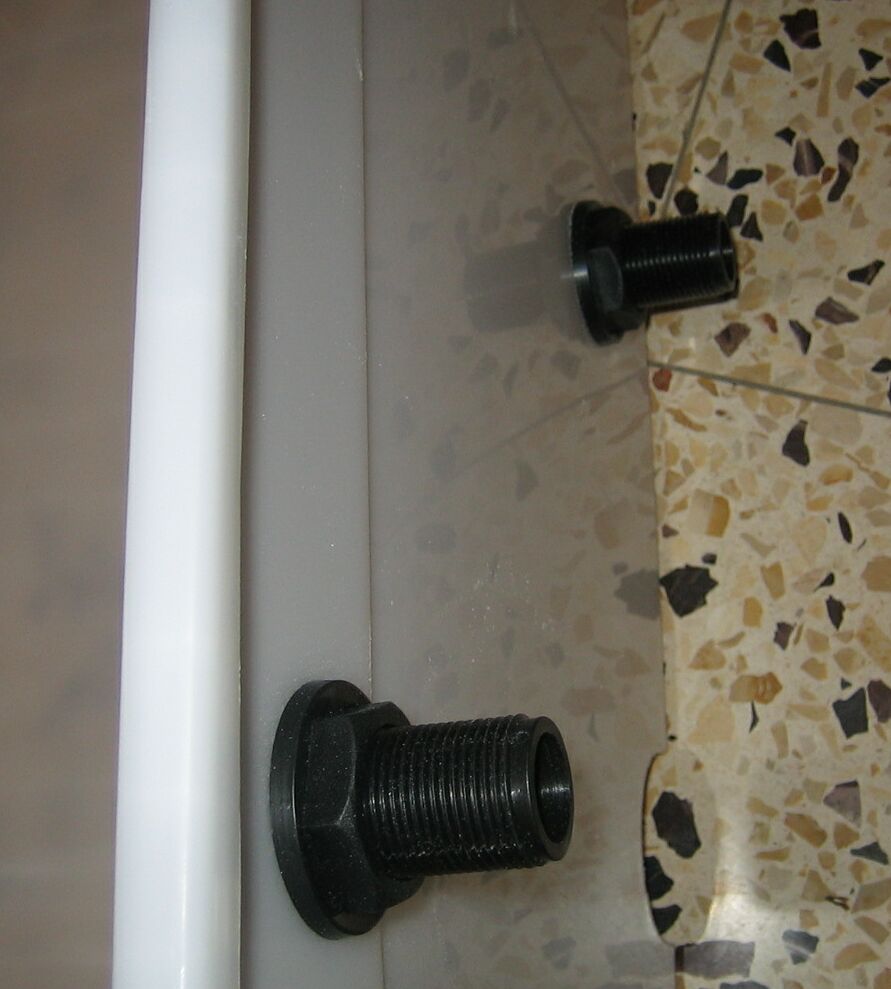
is a must. Here are two views of the outlet fittings from the inside (flush) and the outside (threaded):
I then attached an elbow and a 3/4" connector so that if I need to remove the entire
box at any time, I just remove the hose from the connector and lift the entire box out:
The inlet connector (1") is a special piece that is threaded on both sides of the connector:
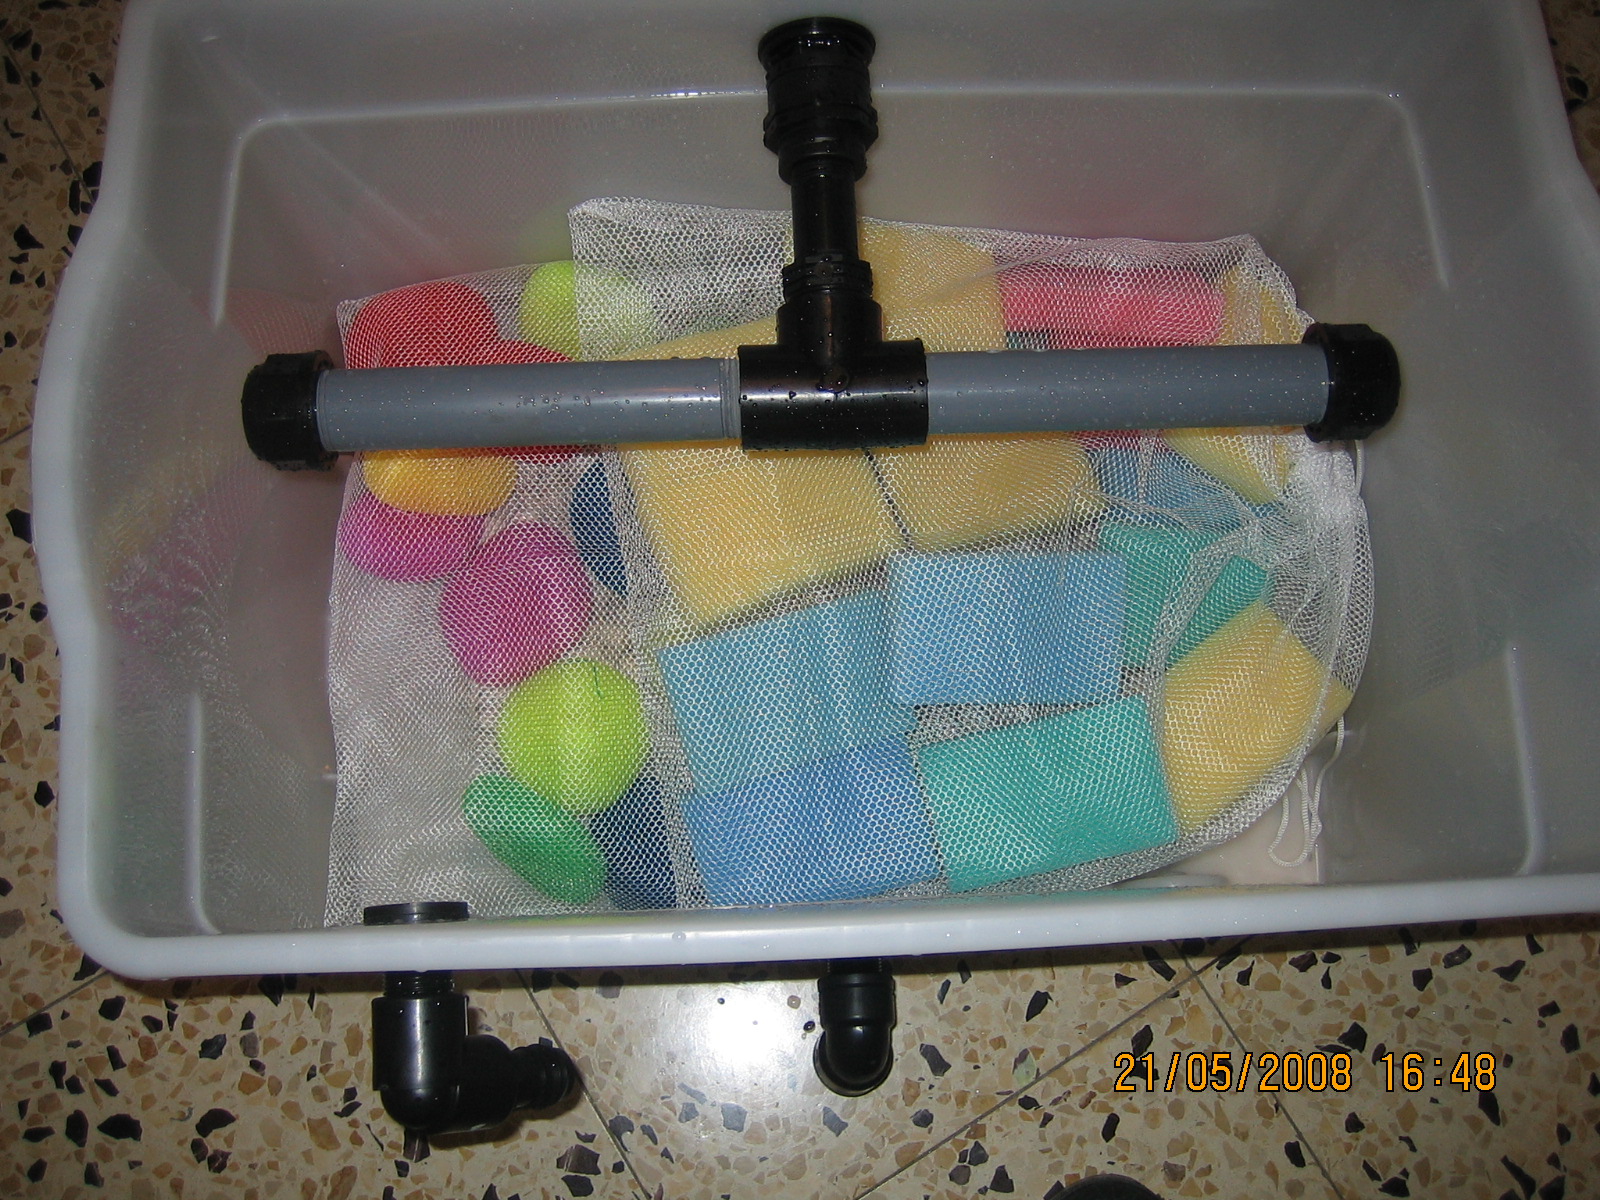
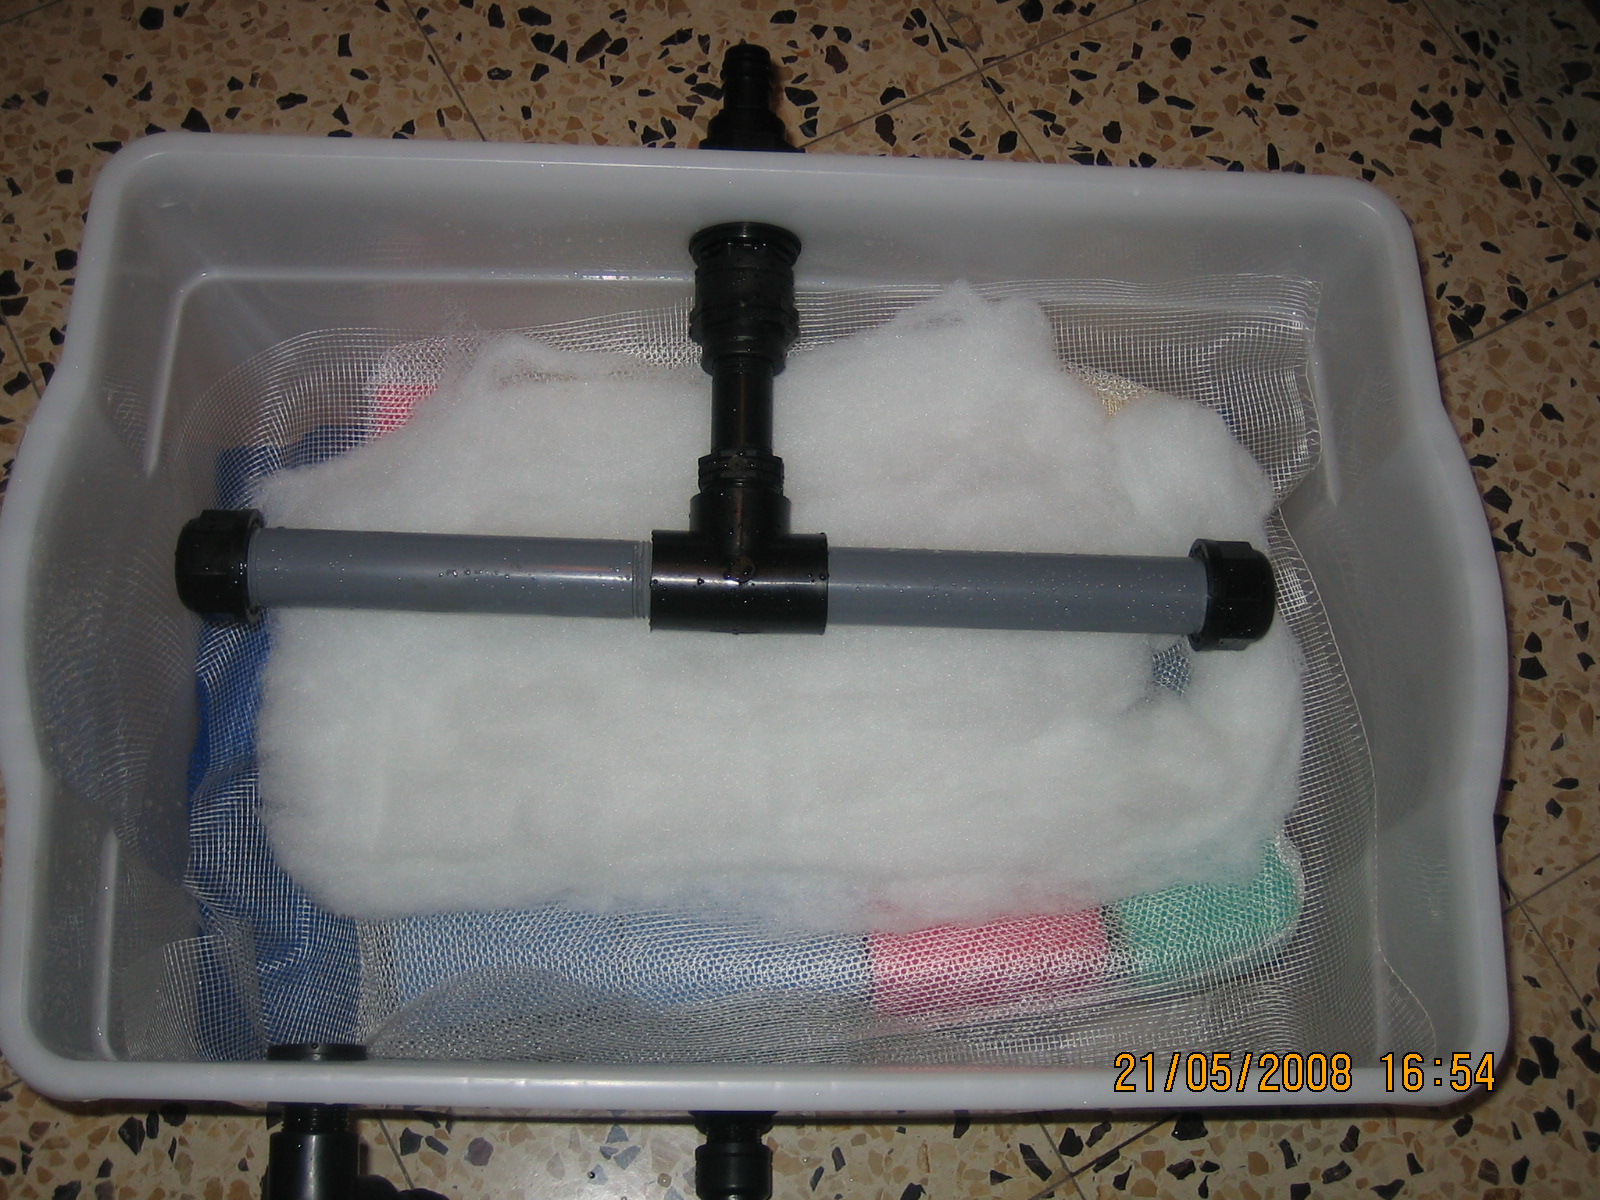
Next, I didn't want to just dump the water via one hose into the filter. I took an idea from
aquarium filters and decided to create a distribution bar:
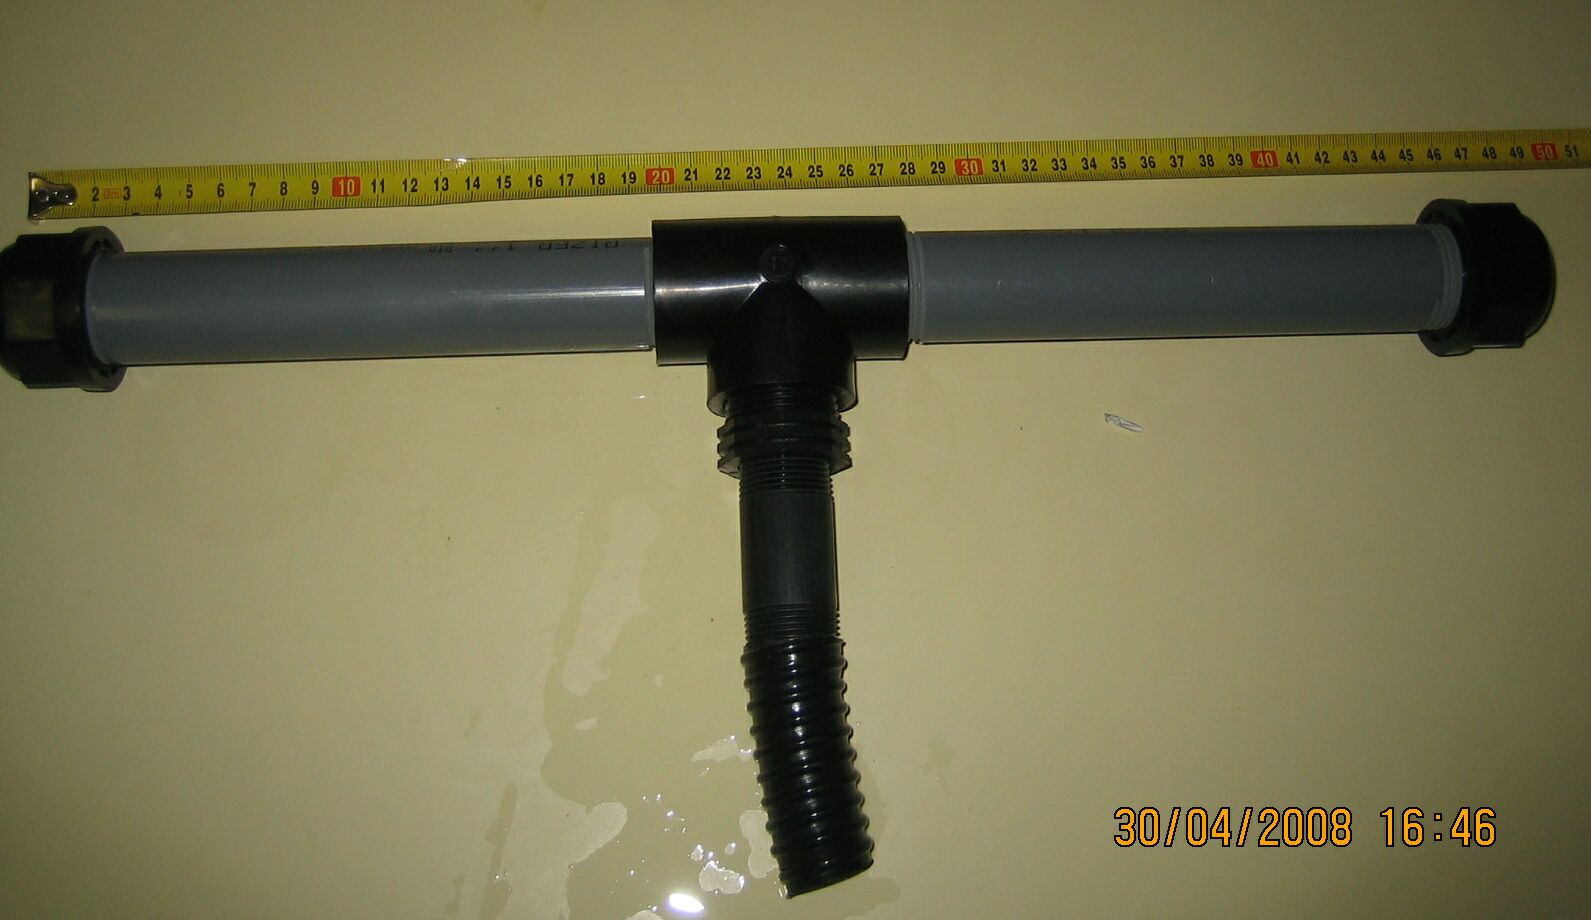
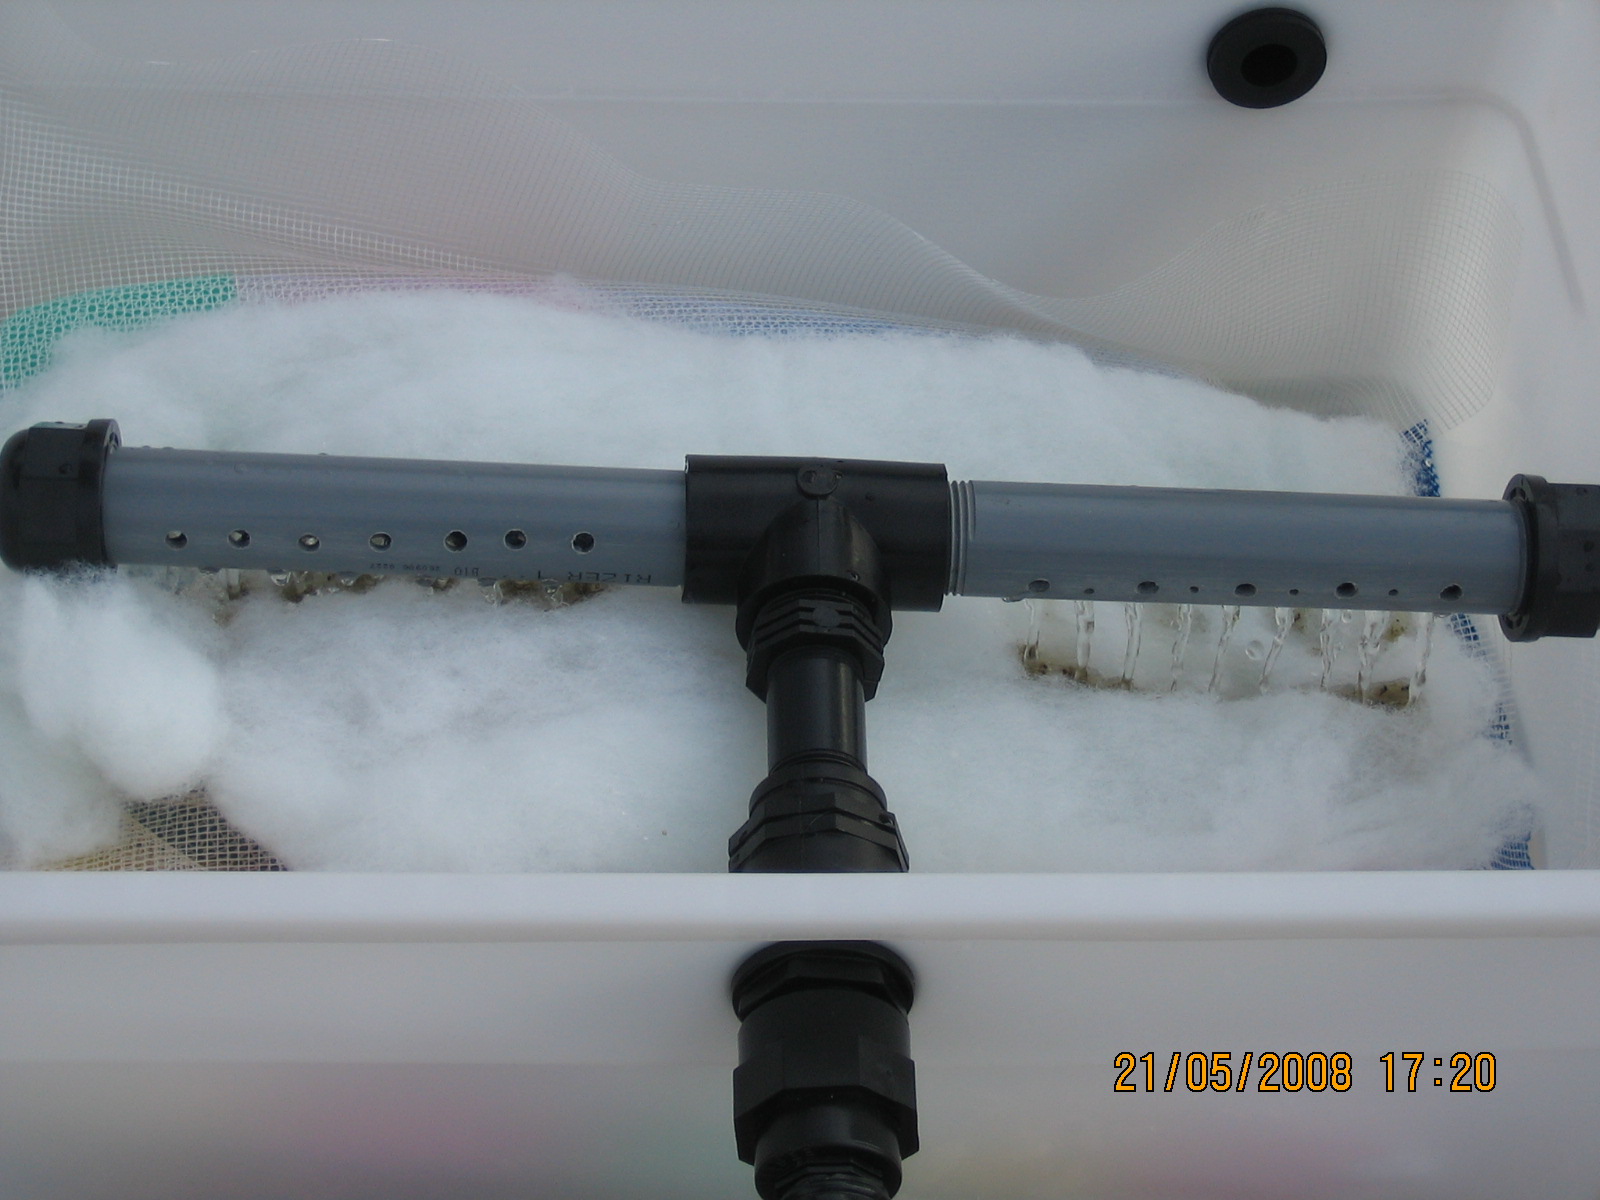
I now drilled into the hard PVC pipe and made numerous holes along the length of the pipe
in three rows so that water will be sprayed in many different directions. Make more holes
than is necessary since they very well might get clogged over time.
After drilling the holes, take a file or screwdriver and scrape down any loose pieces
on the inside of the pipe. Then take sandpaper and remove any stubble on the outside and
on the inside. If you can't get inside the pipe, use a broom handle and attach the sandpaper
to the broom. It is crucial to not have any "hooks" on these holes where string algae and
other gunk can get caught.
Here you
can see that bar mounted inside the container:
I spent about $30 on gardening connectors so at this point I am up to $44 in costs.
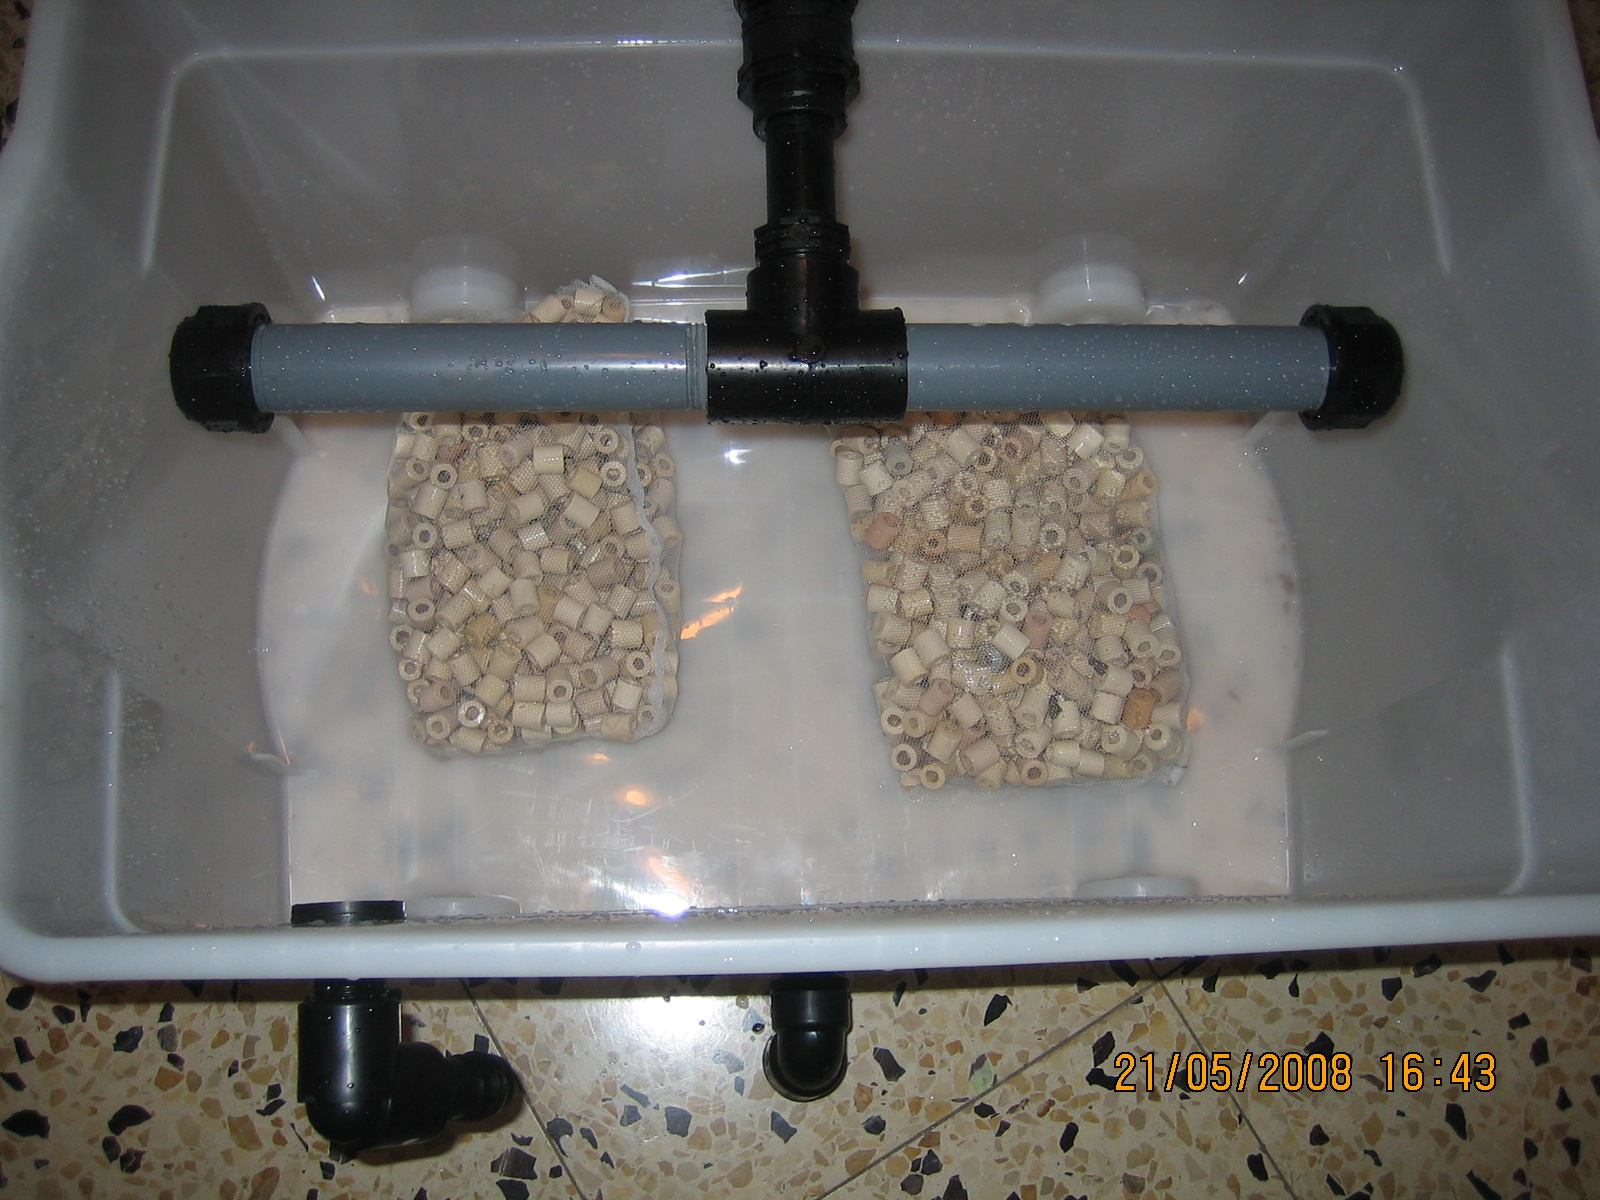
Now I started filling the container with media. First went in cermamic rings to act
as biological media where "good" bacteria can accumulate:
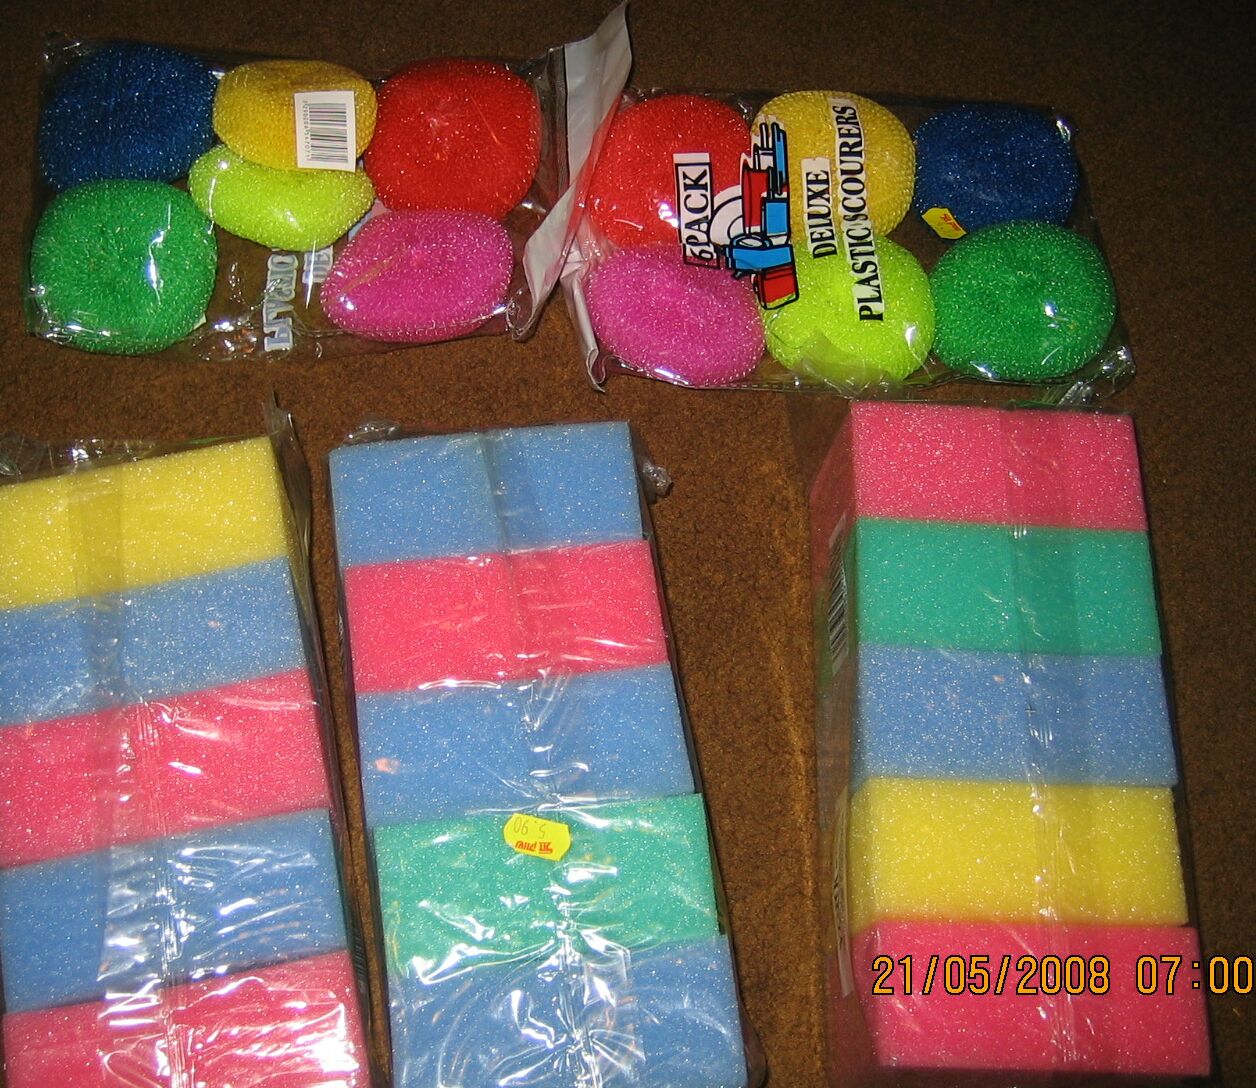
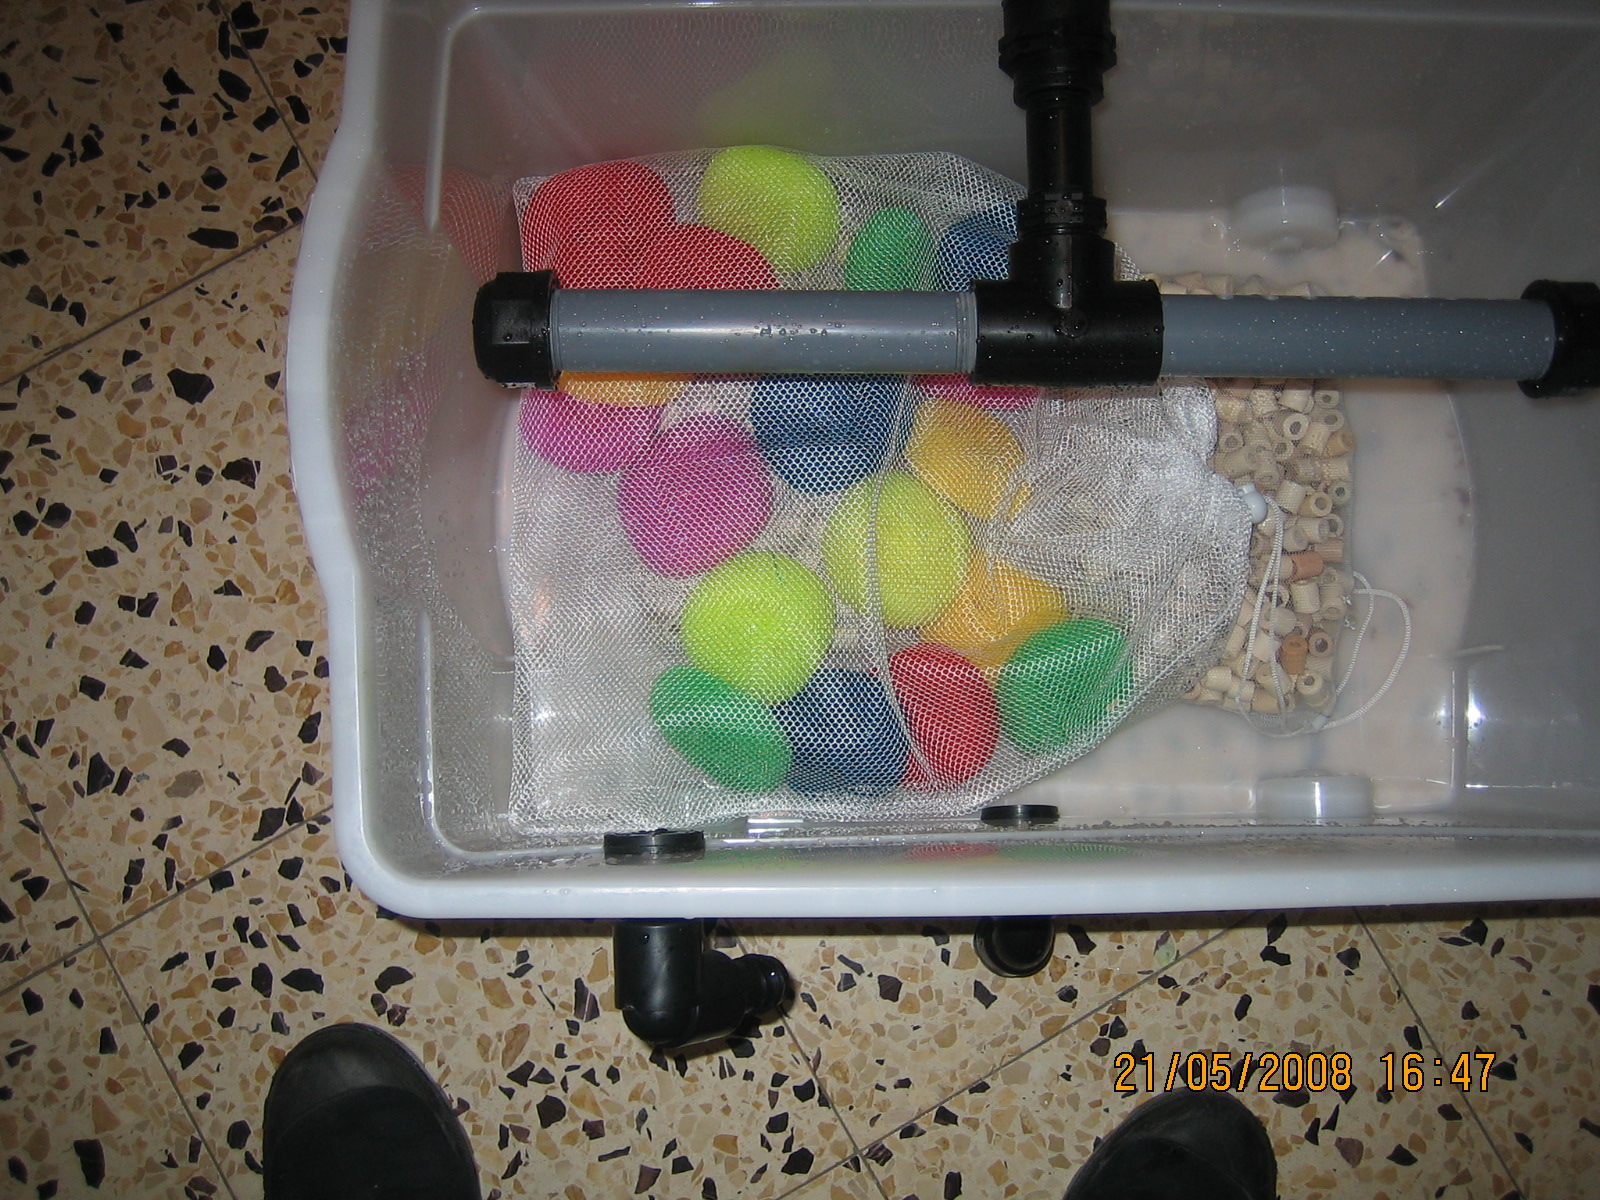
Next I used various sponges that I bought in the supermarket. All sponges were placed in
laundry net bags which I also bought at the supermarket. These bags are used to launder
items with strings that might get entangled in the washing machine. Each bag costs about $2.
I also added layers with a plastic "sticky" drawer liner as well as a layer of
plastic mosquito netting in order to catch big pieces of sludge:

Last comes a layer of Perlon (standard aquarium micro polyester floss) which is excellent at catching all tiny
particulate that comes into the filter. This resides on top of a layer of plastic mosquito
netting for easy removal. The second picture shows the water dripping into the Perlon:
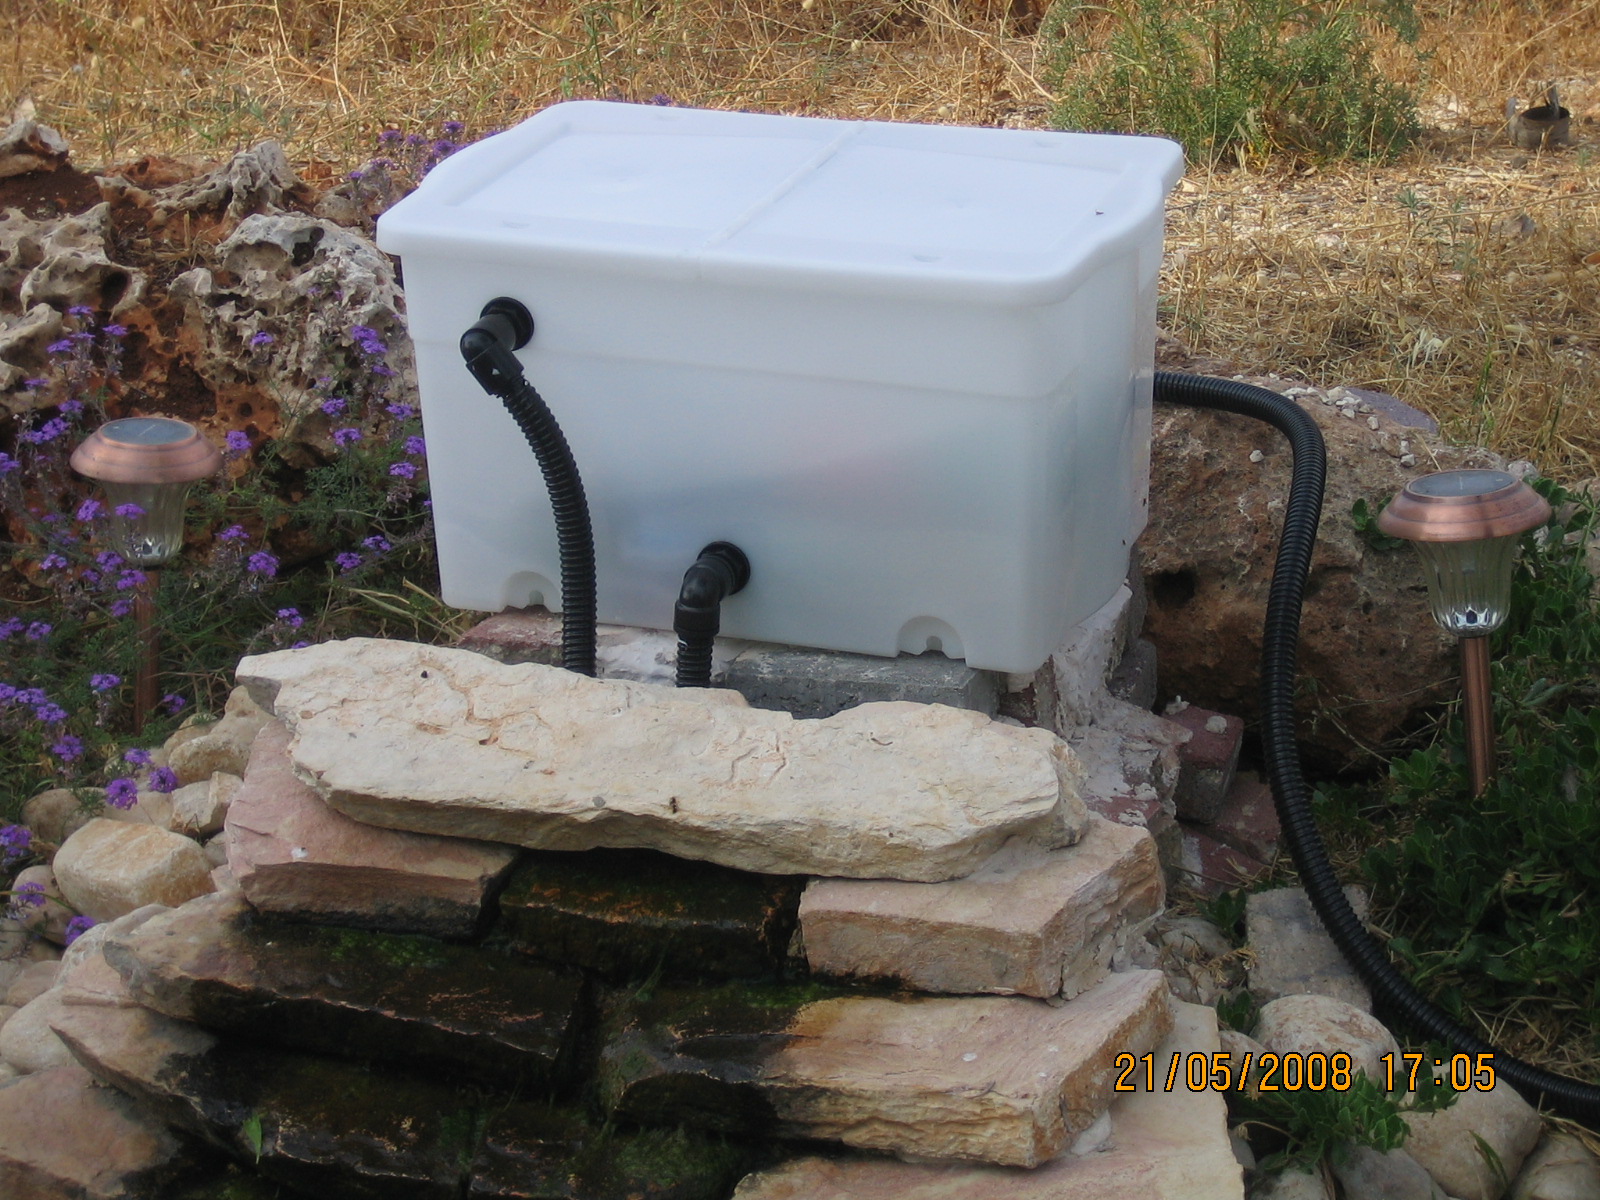
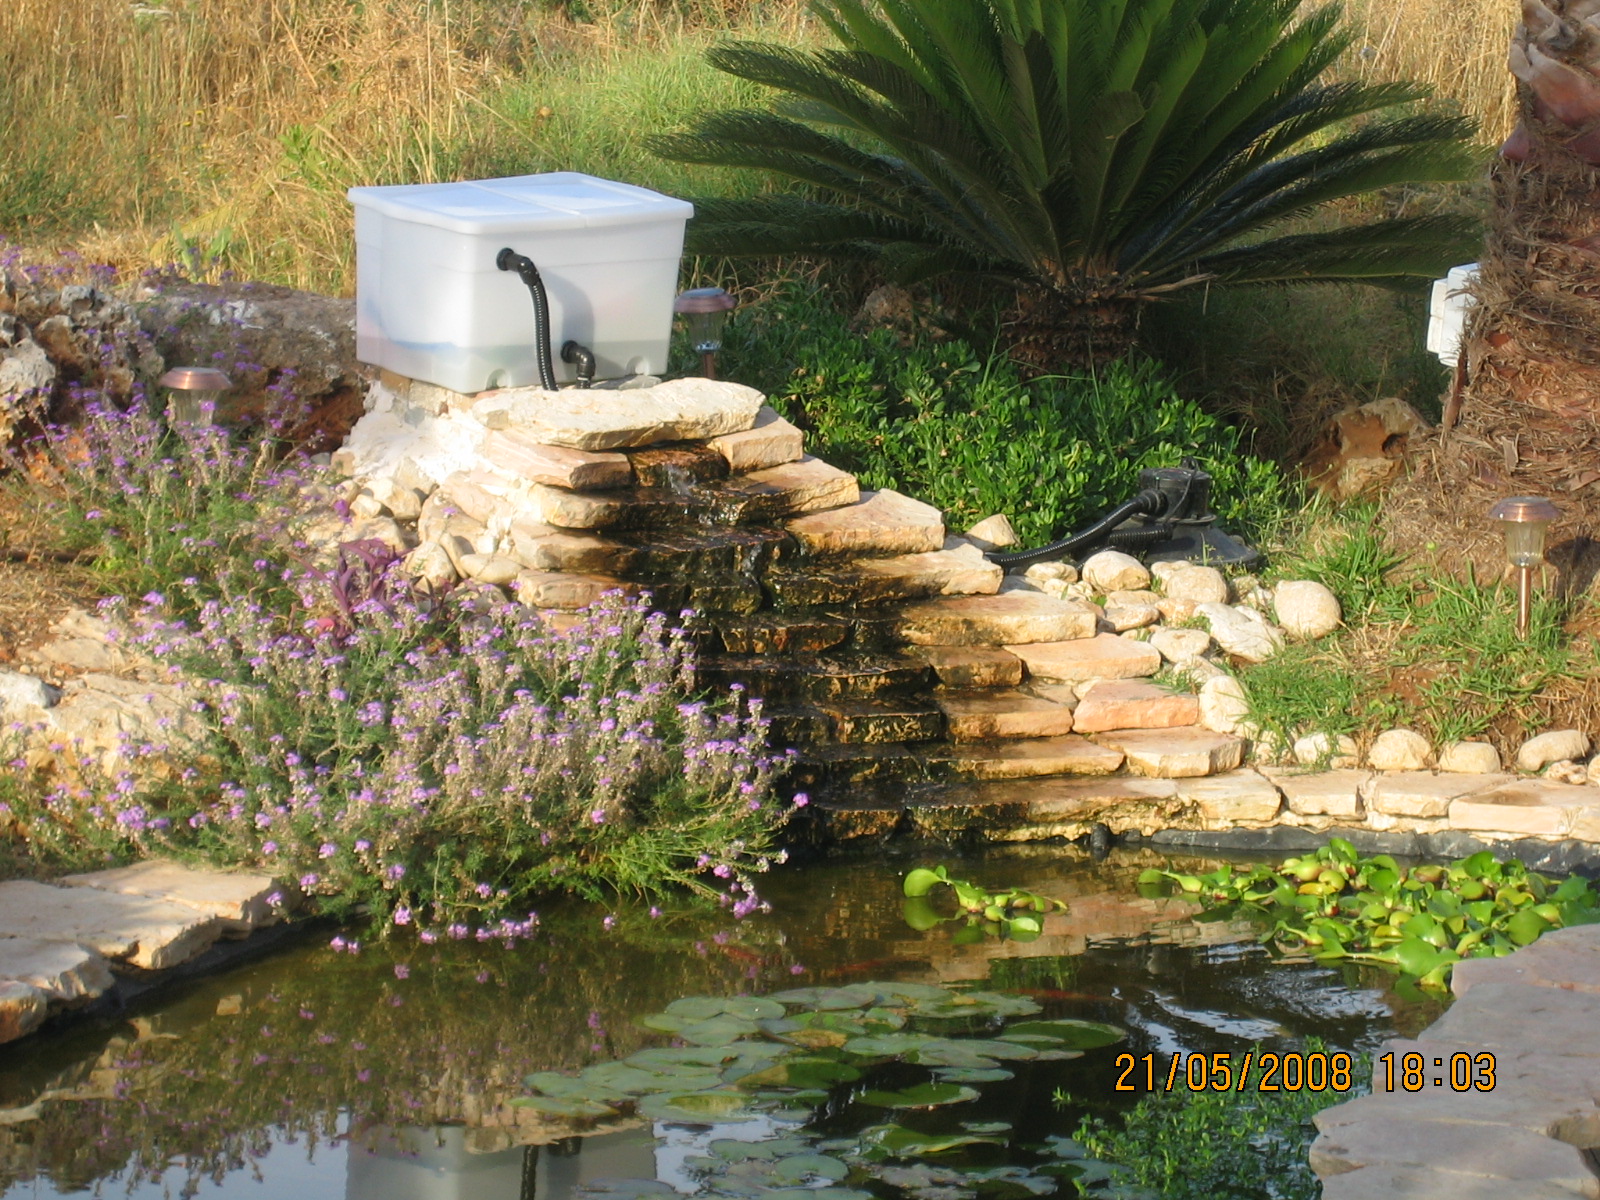
Finally here are some pictures of the filter attached to my existing pressure filter. The long
snaking tubing which goes to the pressure filter will be buried and hidden:
All the sponges and netting and perlon costs me about $10. That brings my total
to around $54. The swatch of perlon I intend to
replace, after it becomes dirty, every few days and that will cost me about $1 each time.
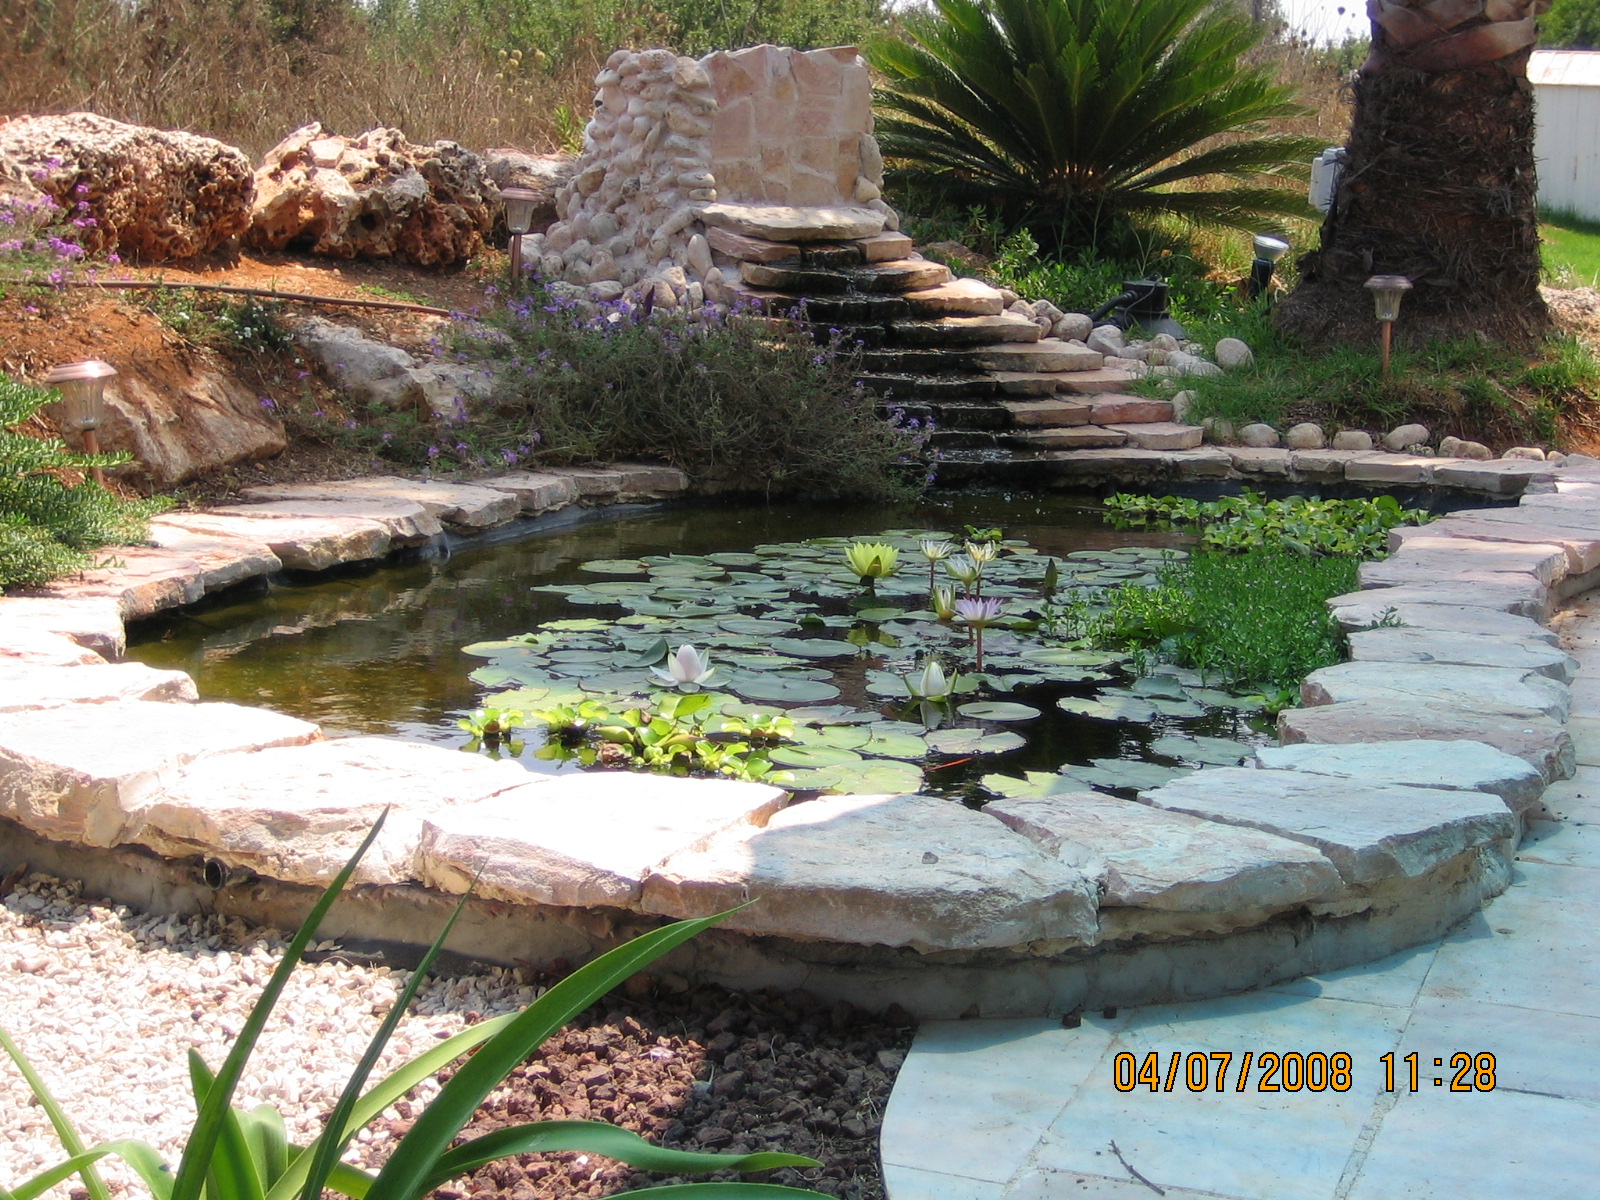
After 2 months I enclosed the filter on 3 sides. On the sides I used river bed rocks
and in the front I used broken paving stones, all cemented together with white cement. I am
leaving the back open so as to have easy access for cleaning and maintenance. On top, I have
ordered a custom piece of white plexiglass. Since it is not UV resistant and I don't want
the plastic filter box to disintegrate in a year, I will be placing a custom cut beduin blanket
to fit under the plexiglass.
May 2010 update
After two seasons I am modifying the filter setup. I have found that the distribution bar gets clogged way too fast and I often have to clean it once a week - especially in the summer. I have also found that small particulate gets through and is not caught properly. So I have removed the distribution bar and instead tied an aquarium filter media bag to the inlet as a first filtration (actually two bags - one in each direction - I still use the T splitter). This has worked very well and the water is much clearer.
October 2012 update
After four full years, the filter broke. I have it covered on all sides yet the northern side (least amount of sun) has a Beduin blanket hanging down covering it. The blanket covers 80% of the filter and the break happened at the bottom 20%. Remember this box is meant for indoor storage use. By leaving it outdoors in the sun and rain does have an effect.
It started with a small drip and I used underwater epoxy to close the hole but due to the brittleness of the plastic, the hole got bigger and bigger. After I replaced the filter box, I was able to push my thumb through dry spots in the filter. It cracked easily. The rest of the box was totally pliable and could have lasted another 5 years.
What this shows is that even with no direct sunlight, plastic needs to be protected from even indirect sunlight.